Email Signature Usage
Your signatures have been created.
- Six versions of the email signature have been generated.
- Proofread your signature to be sure all information is correct.
- After all information is verified, follow the implementation instructions below.


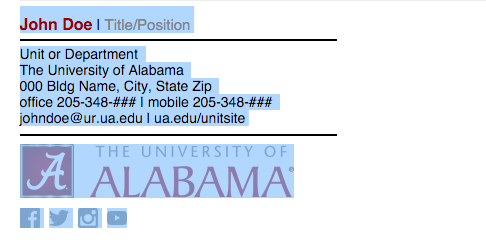
The University of Alabama
Implementation Instructions
For instructions on how to implement your new signature, please select the menu option below that corresponds to your preferred email client.
These instructions represent the most commonly-used email clients at UA; if your preferred email client is not listed, please consult the "Help" documentation in your client for information on using email signatures. If you are having issues while setting up your email signature and need assistance, please contact us at web@ua.edu.
-
Highlight the desired signature and press CTRL + C.
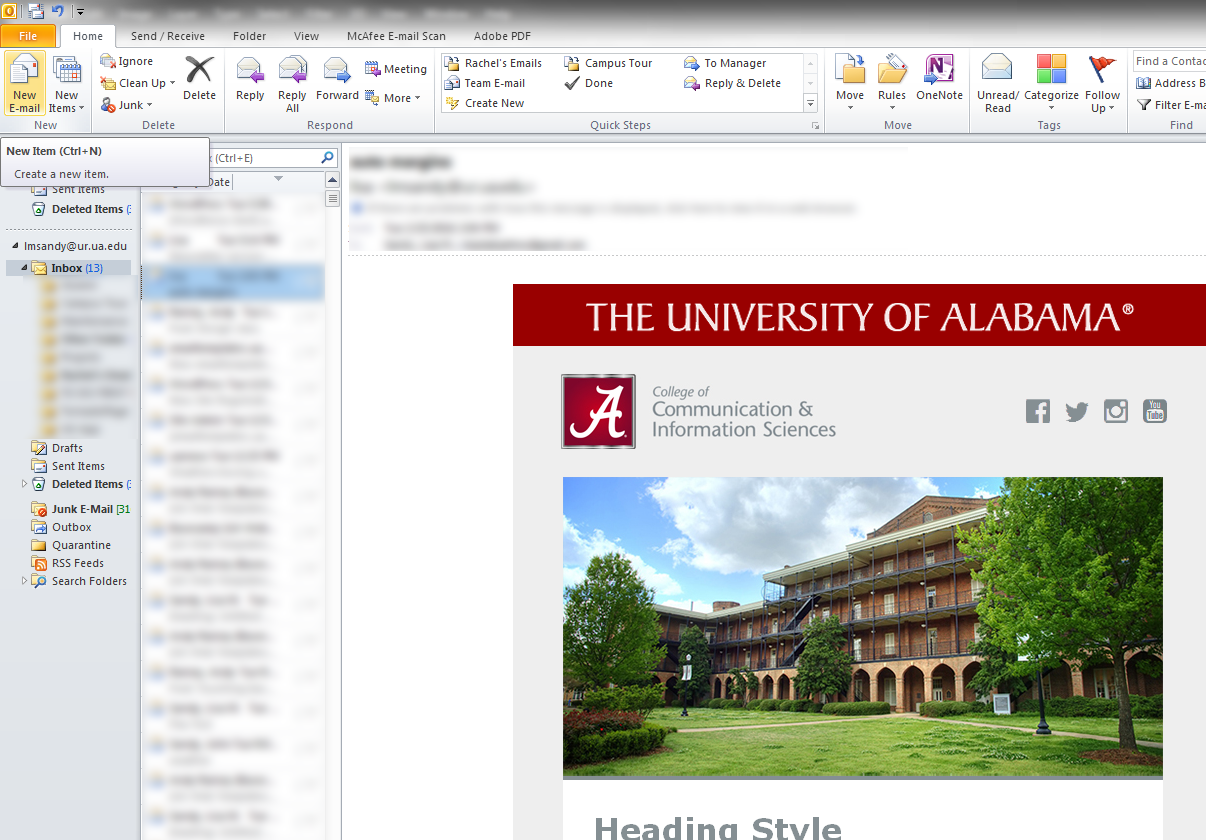
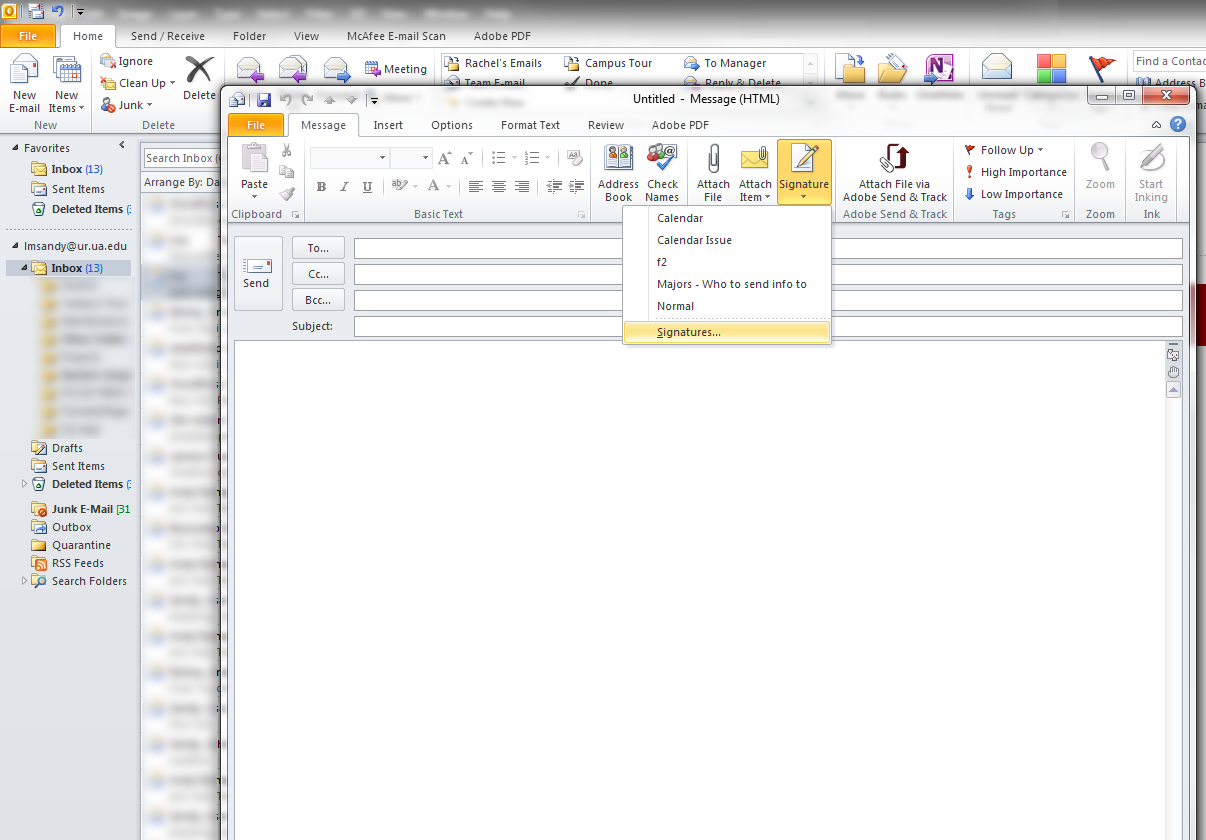
- Open Outlook.
-
Click "New Email" in the upper left hand portion of the window.
-
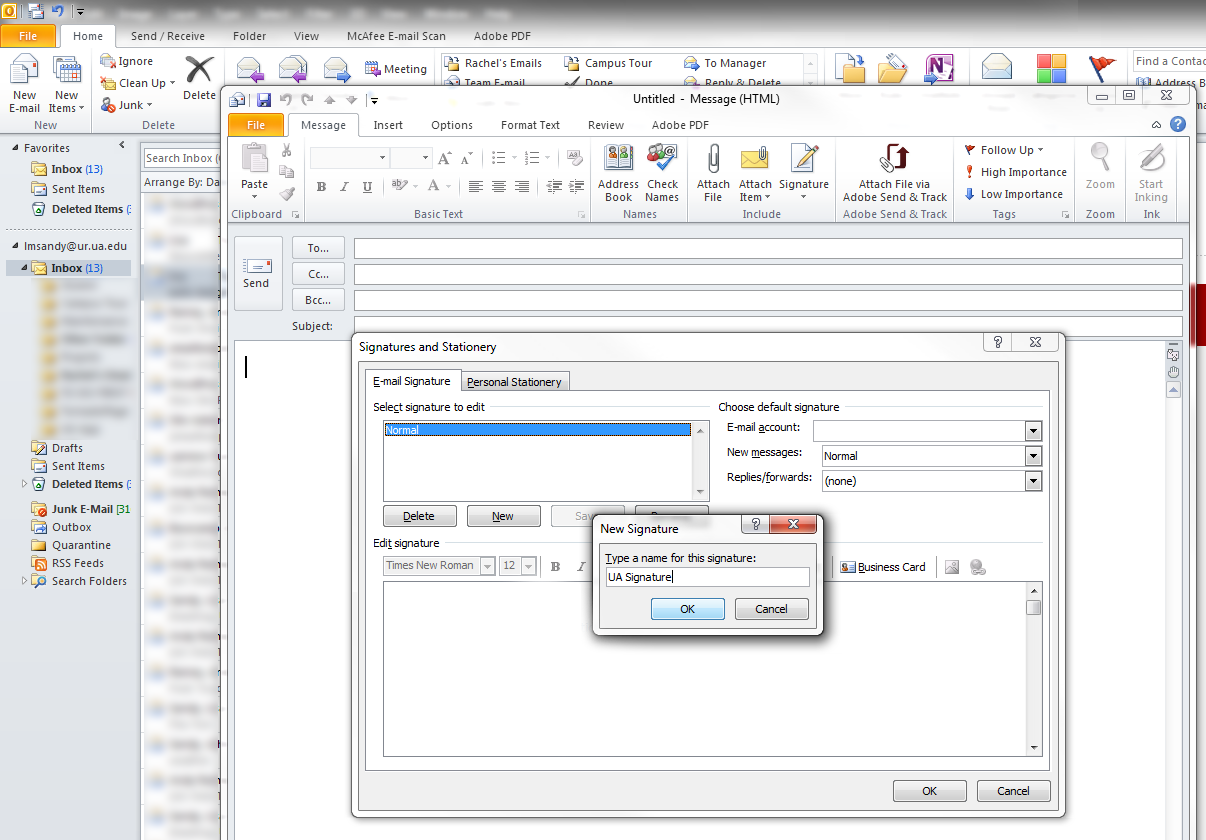
In the new email window, click "Signature" in the toolbar. From the drop down menu, select "Signatures."
-
If you are creating a new signature, click the "New" button. If you are editing an existing signature, select it from the menu.
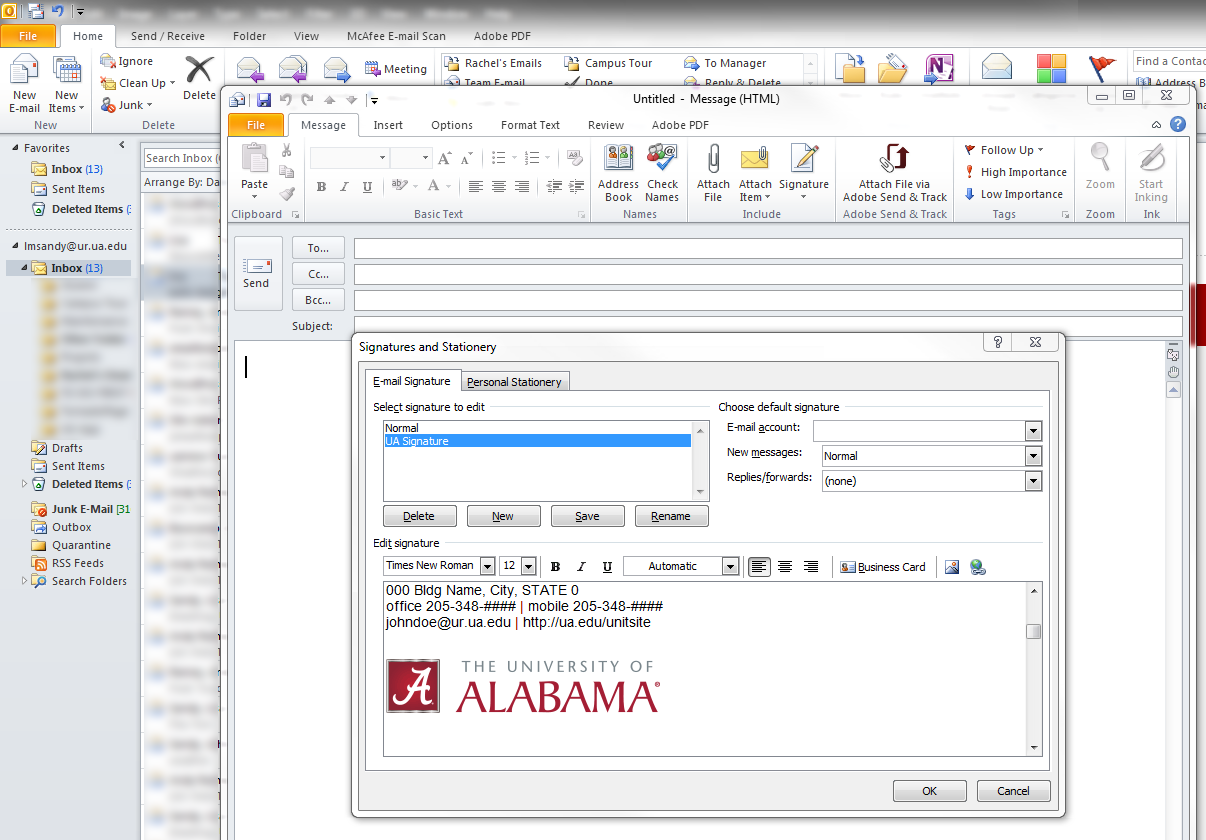
- Paste your new signature in the window by pressing Ctrl-V. All graphics may not be visable. This is normal.
-
To make your new signature the default signature, select the signature name in the "New Messages" field under the "Choose default signature" heading.
- Click “OK” to save.
-
Highlight the desired signature and press Command + C.
- Open Outlook.
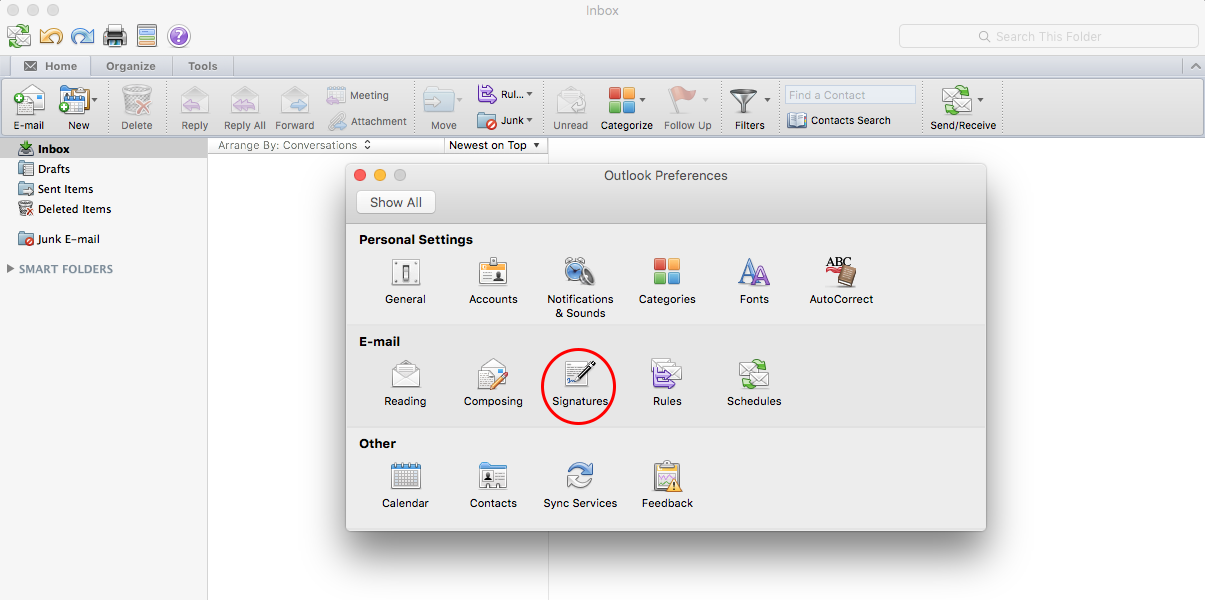
- Open preferences by pressing Command + the comma key.
-
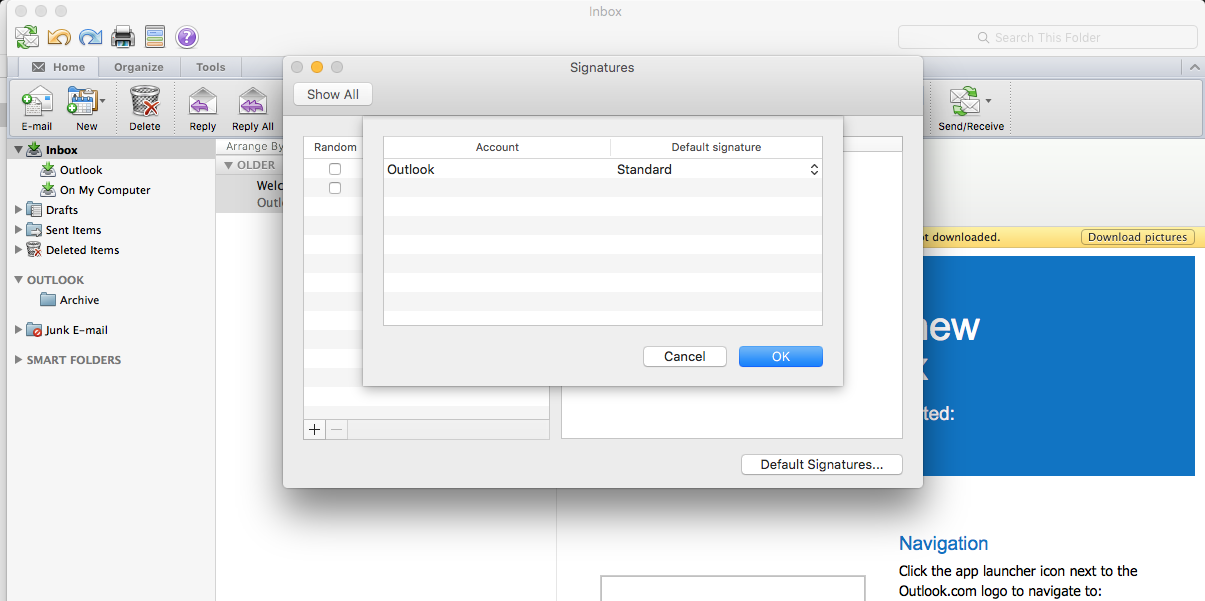
Select the "Signatures" option. This area is indicated below by the red circle.
- In the pop-up window, click the "+" in the lower portion of the left pane. This area is indicated below by the red circle. An "untitled" signature will be created.
-
Paste the signature in the right side portion of the window by pressing Command + V.

- Your signature is automatically saved.
-
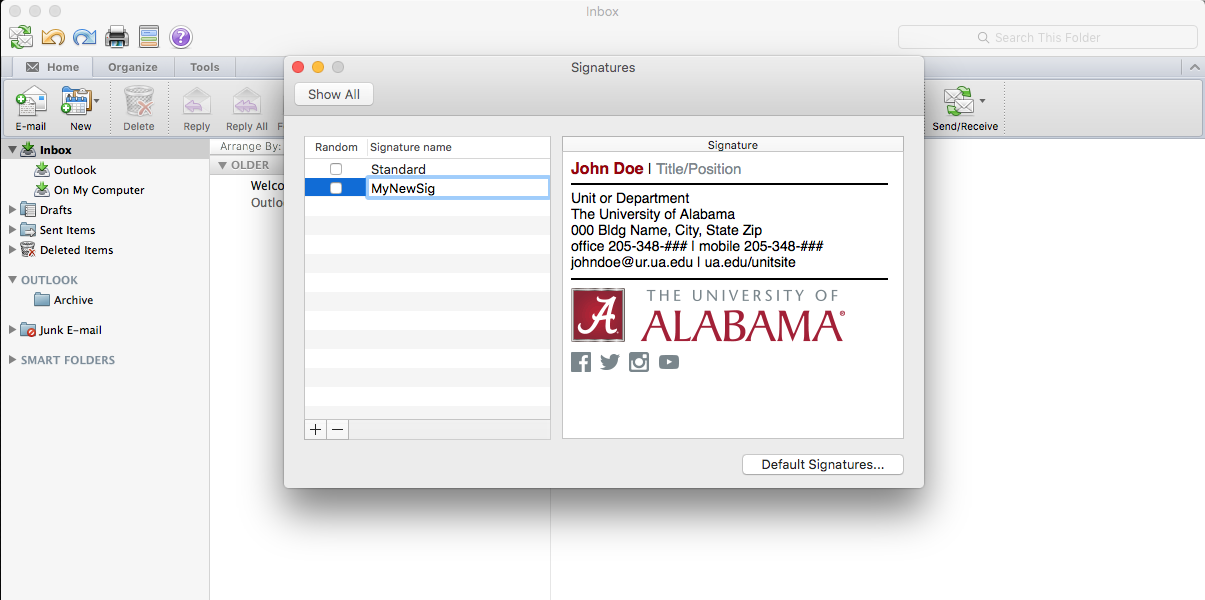
You may give your new signature a name by double clicking the "Untitled" signature, typing the desired name and pressing the Enter key.
-
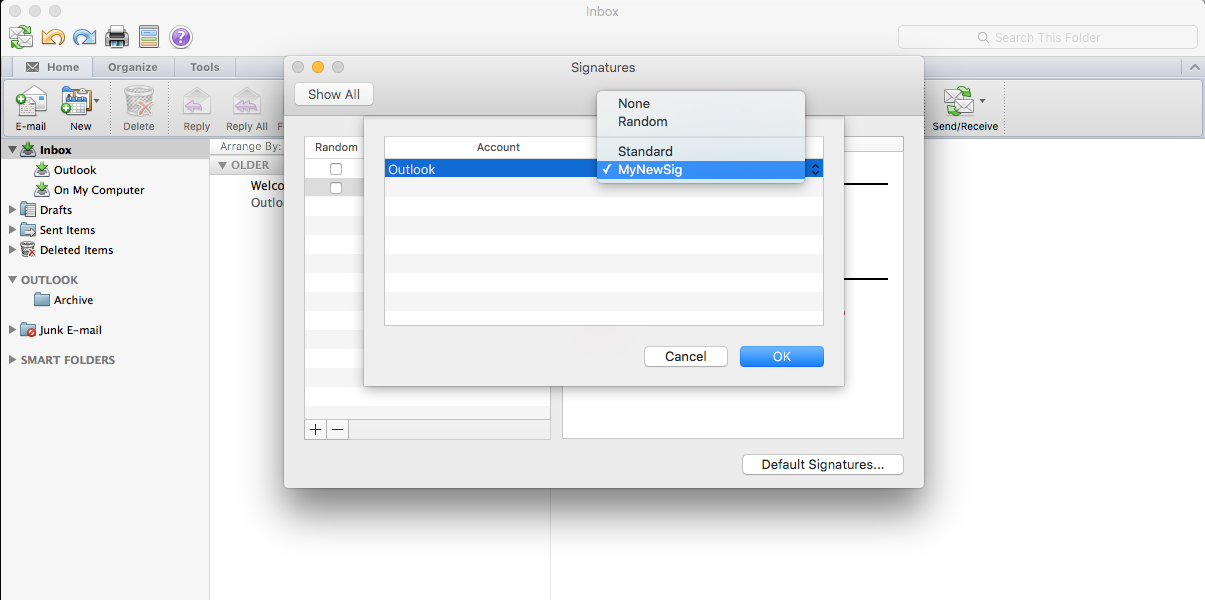
To make your new signature the default signature, click "Default Signatures..." in the lower right portion of the "Signatures" pane.
-
Select the email account to apply the signature to and click under the "Default Signature" heading. Select your signatures name and press the "OK" button.
-
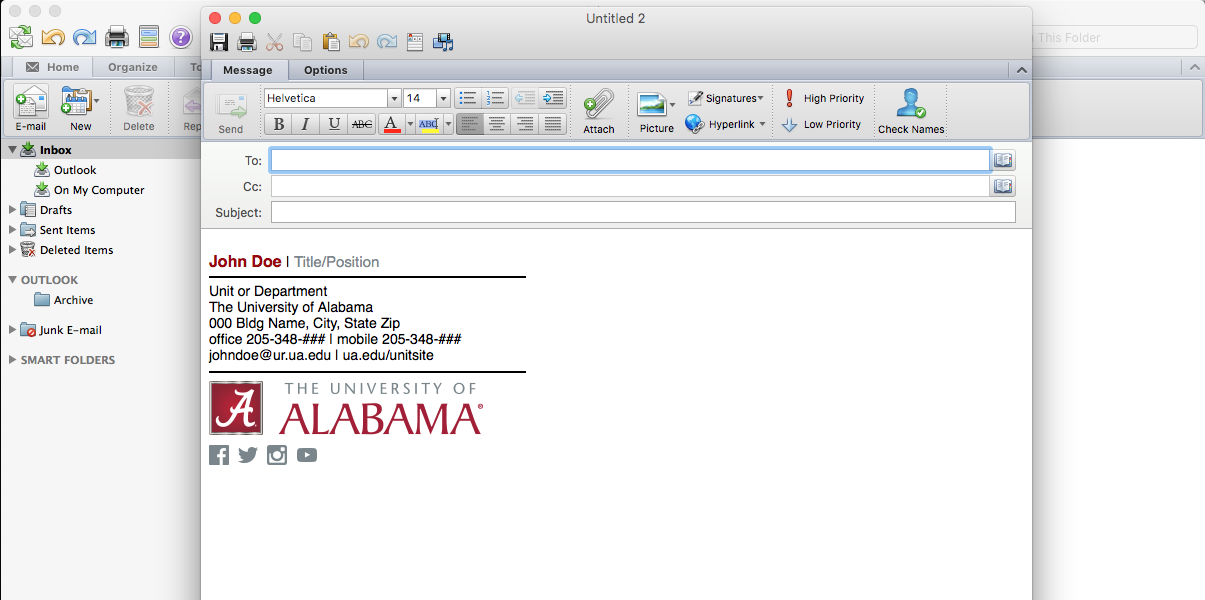
When you create a new email, you will see you signature is automatically applied.
-
Highlight the desired signature and copy.
- Mac users: Press Command + C
- PC users: Press CTRL + C
-
Log into your Gmail account. Click the gear symbol in the upper right hand corner and select "Settings".
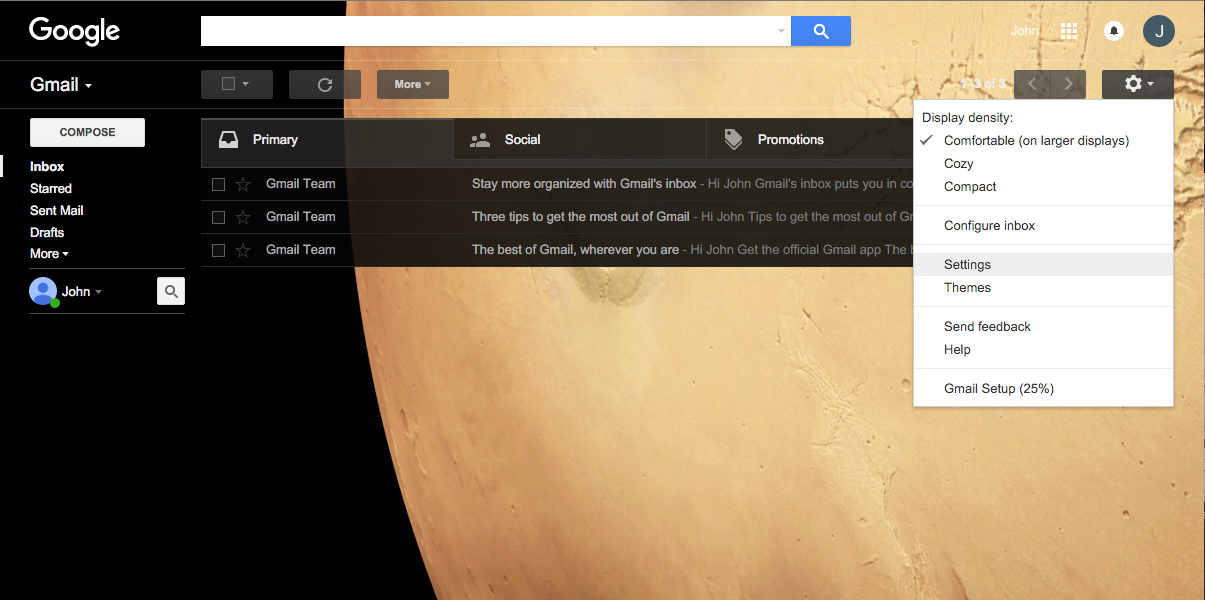
- On the "General" tab of the "Settings" page, scroll down to the "Signature" section.
- Paste the signature into the signature field.
- Mac users: Press Command + V
- PC users: Press CTRL + V
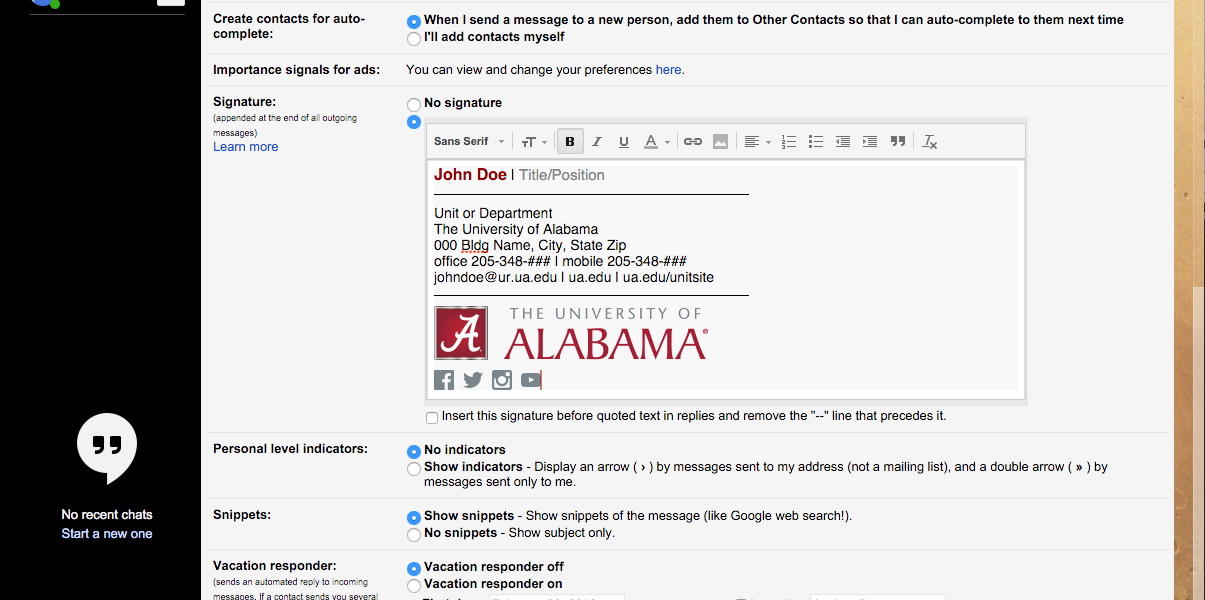
- Scroll to the bottom of the page and select "Save Changes."
- The signature will automatically be set as the default signature.
-
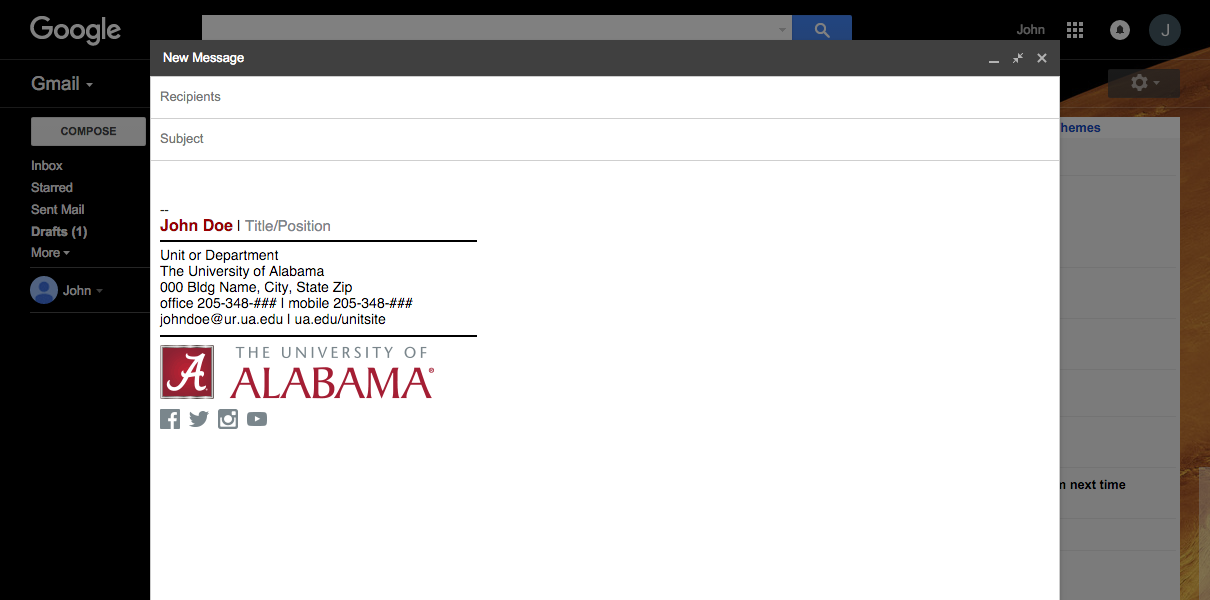
When you create a new email, you will see your signature is automatically applied.
-
Highlight the desired signature and copy by pressing Command + C.
- Open Apple Mail.
- Open the preferences window by pressing Command + the comma key.
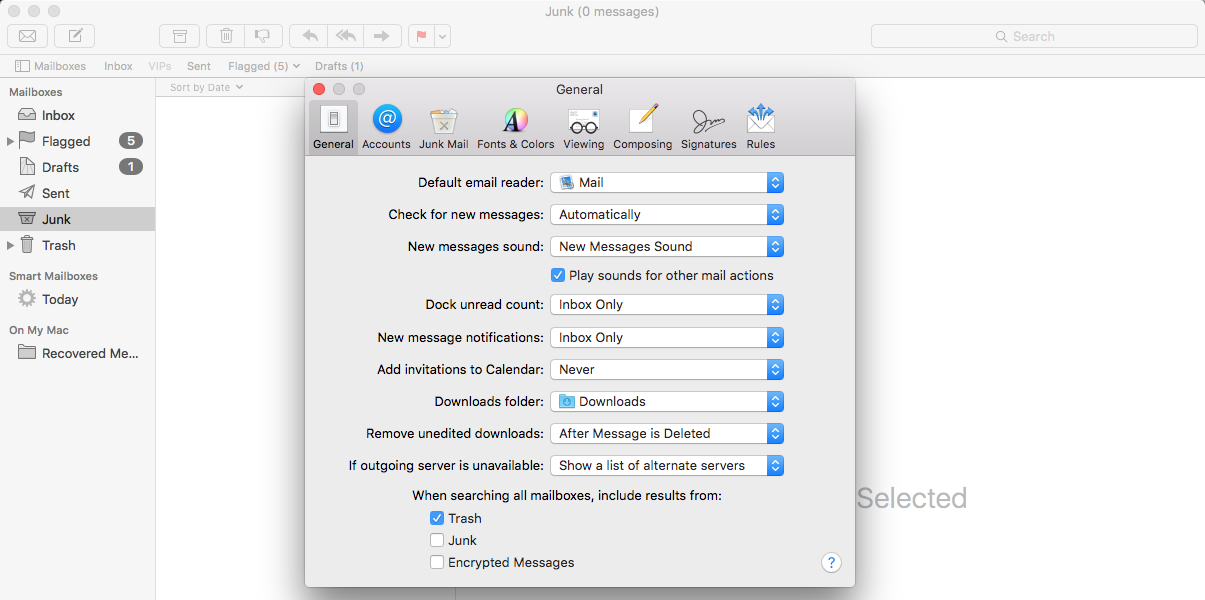
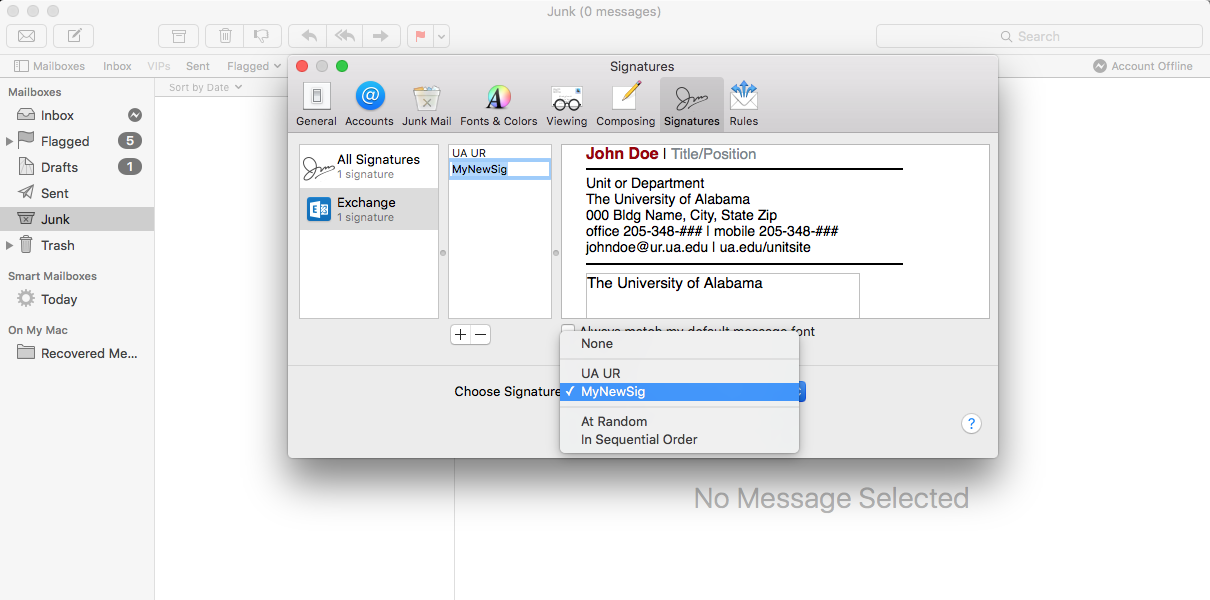
- Select the "Signatures" tab. This area is indicated below by the red circle.
- To create a new signature, click the "+" in the lower portion of the middle pane. This area is indicated below by the blue circle.
-
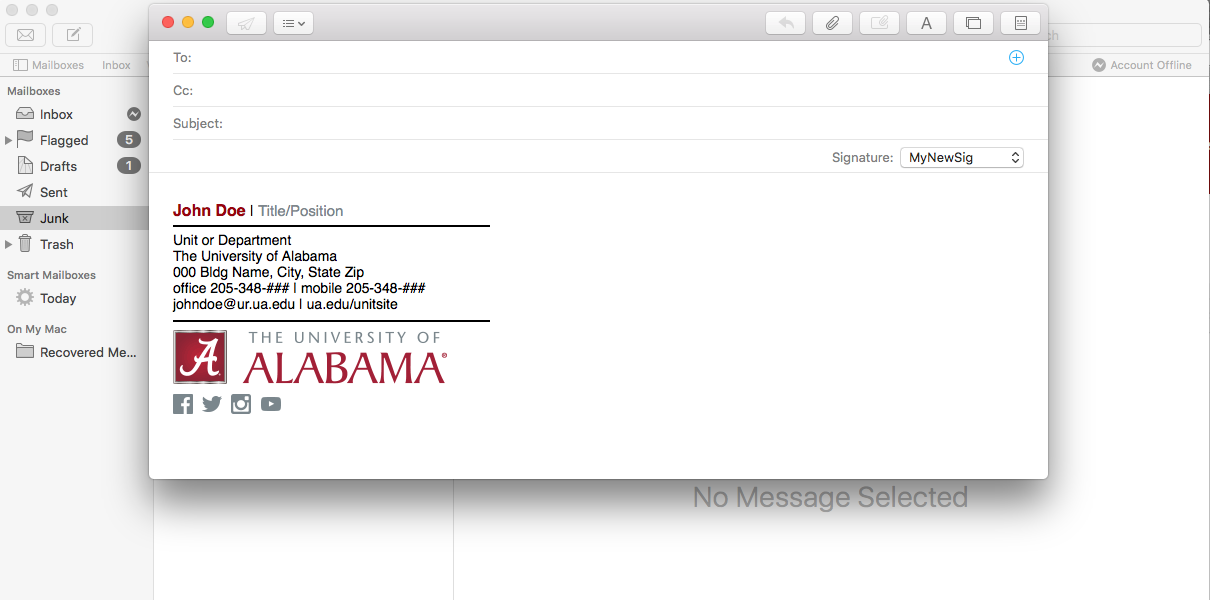
Paste the signature into the signature area by pressing Command + V. The images may not be visible after pasting. This is normal.

-
You may give your new signature a name by double clicking the signature name in the middle pane, typing the desired name and pressing the Enter key.
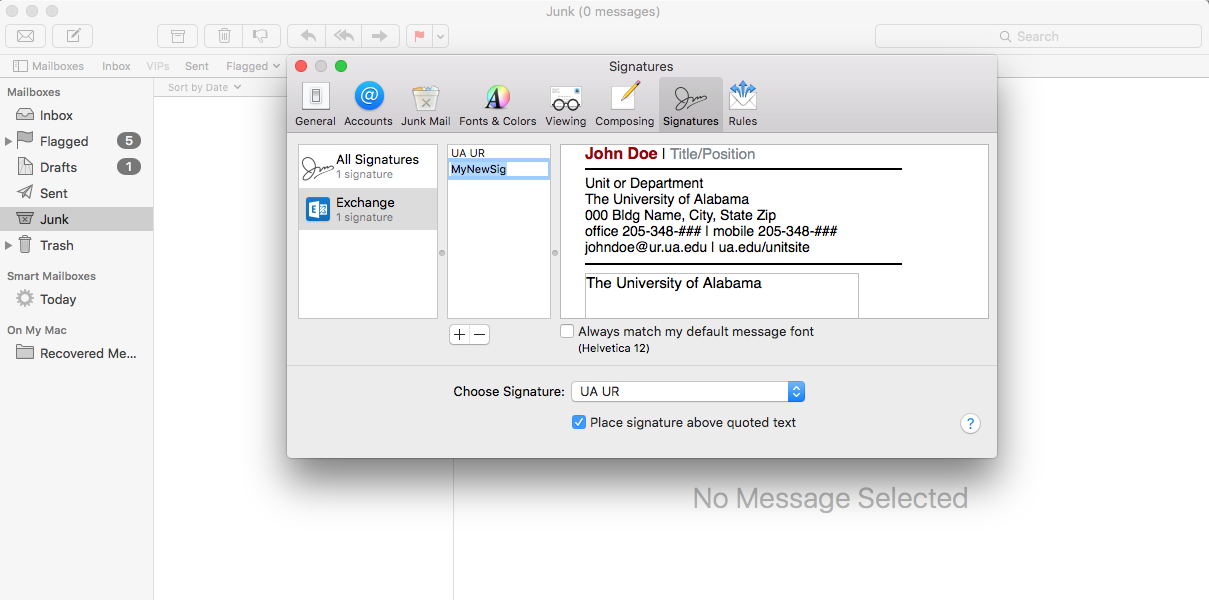
- Your signature is automatically saved.
-
To make your new signature the default signature, click the field next to "Choose Signature" and select your new signatures name.
-
When you create a new email, you will see your signature is automatically applied.
-
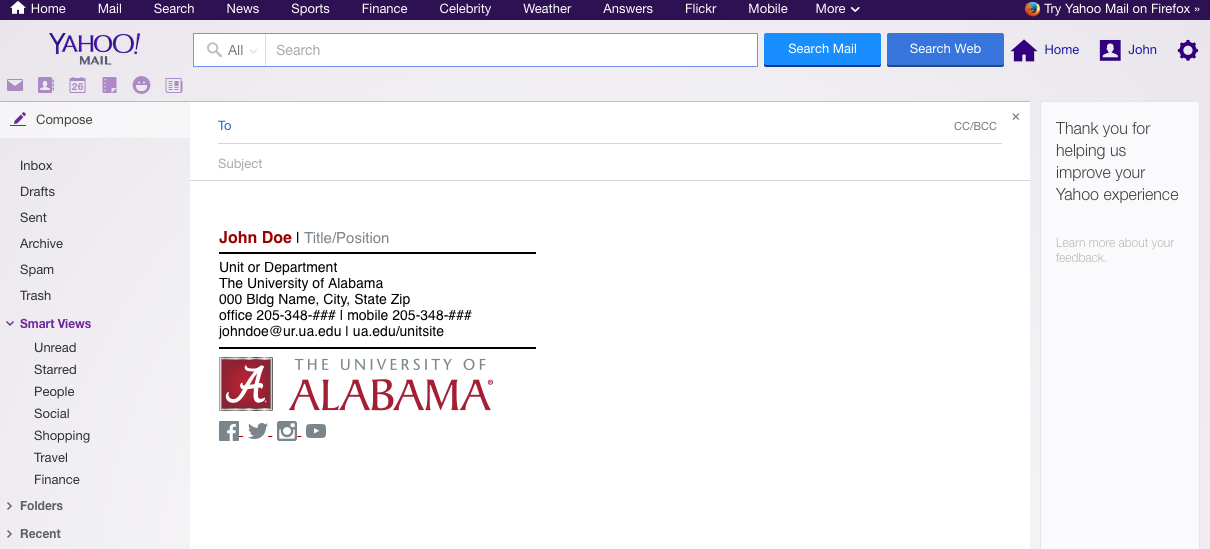
Highlight the desired signature and copy.
- Mac users: Press Command + C
- PC users: Press CTRL + C
-
Log into your Yahoo account. Click the gear symbol in the upper right hand corner and select "Settings".
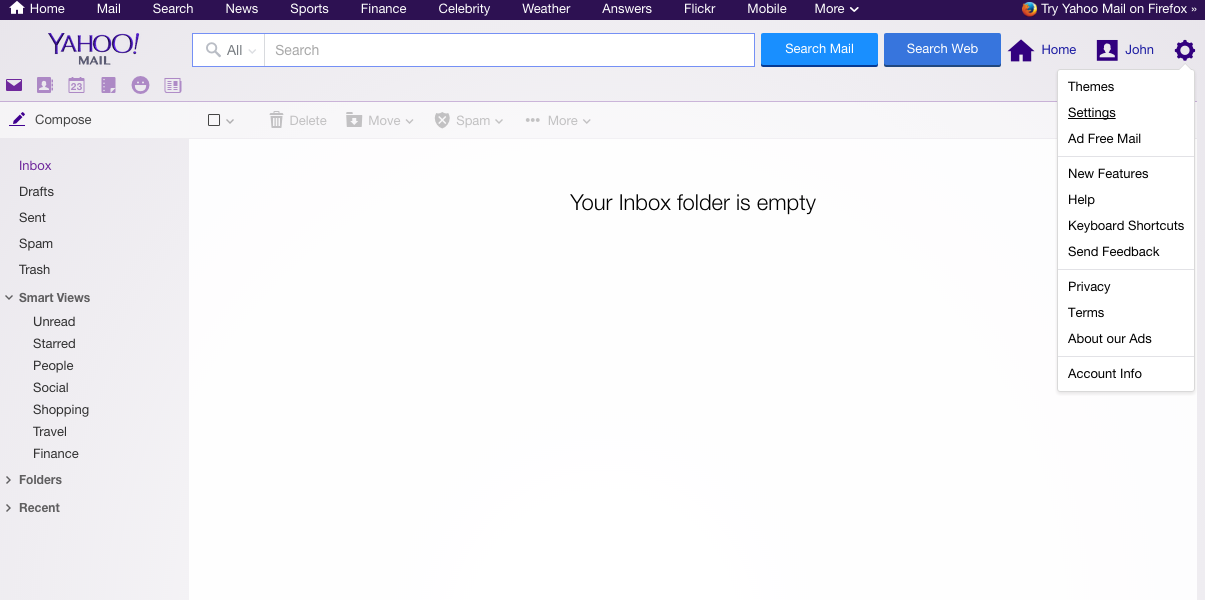
- In the "Settings" window, select "Accounts."
-
Select the email address you wish to apply the signature to.

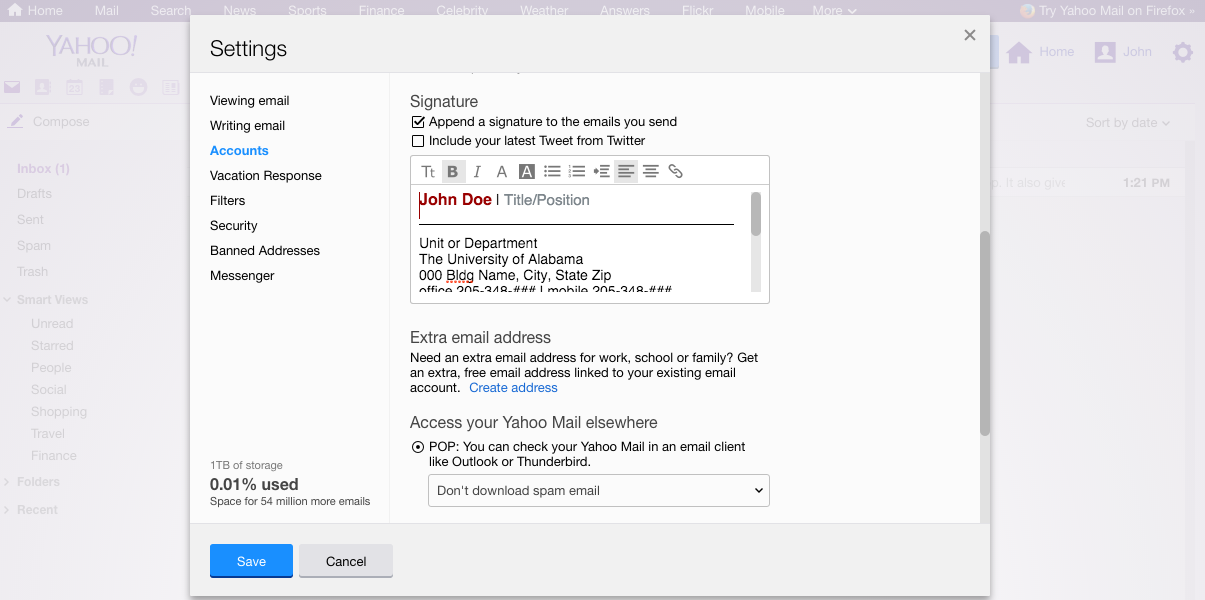
- Scroll down to the "Signature" section.
- Paste the signature into the signature field.
- Mac users: Press Command + V
- PC users: Press CTRL + V
- To make your new signature the default signature, check the box next to "Append a signature to the emails you send" under the "Signature" heading.
-
Click the "Save" button.
-
When you create a new email, you will see your signature is automatically applied.